After 2 warm up games using the basic X wing set which is 1 X Wing against 2 TIE's we moved on to a more adventurous game using:
- Millennium Falcon flown by Han Solo, with assault missiles, Chewbacca and his action card to repair a shield, an Ugnaut weapons engineer card to allow target lock on 2 ships, plus a Dare Devil card.
- Flying as escort was Luke Skywalker and R2D2 with is repair shields card armed with proton torpedoes.
The boys played the Imperials taking 2 ships each.
- Eldest nephew had 1 TIE Obsidian Squadron pilot and 1 TIE Interceptor with an Alpha Squadron pilot.
- The youngest nephew had a TIE bomber flown by a Scimitar Squadron pilot armed with advanced proton torpedoes, assault missiles and seismic charges. His other fighter was a TIE with an Academy pilot.
I fielded 93 points for the rebels and the boys had 72 points between them.
The table was roughly 3ft by 5ft.
The Game
Turn 1
The Imperials zipped forward and the rebels discovered they'd mixed their manoeuvre dials up. Han turned the Millennium Falcon instead of going straight and Luke headed straight between the TIE bomber and TIE fighter rather than trying to isolate a fighter.
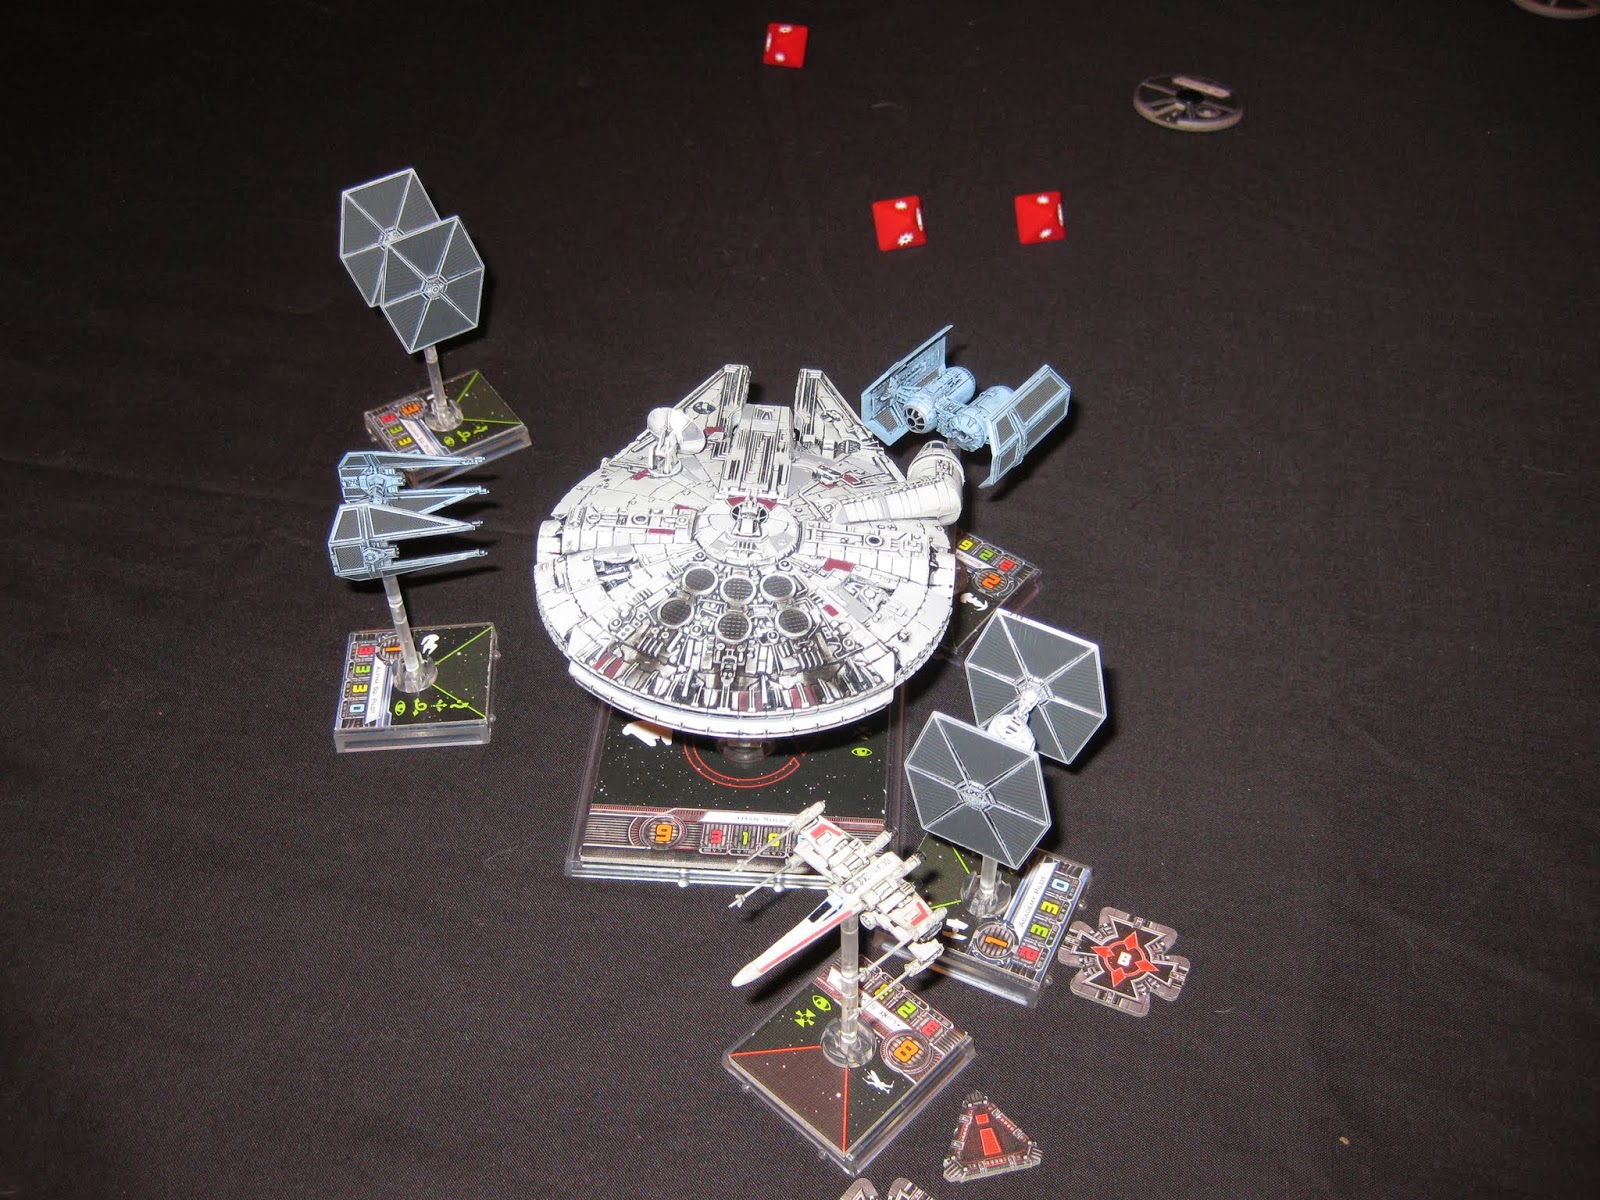
 |
| Initial set up, just before I discovered I'd mixed the manoeuvre dials up. |
 |
| End of Turn 1. |
This turn began with a slight cat interruption. He'd heard I was throwing rubbish dice again and had come in to give moral support.
 |
| Max arrives |
 |
| Max gives his world famous stare. Unknown to him his good luck charm is countered by his sister asleep under the table wrapped in the over hanging tablecloth. |
Han fired first! But the TIE Bomber shrugs off his shots.
 |
| The action lit up by Imperial fire impacting on the Millennium Falcon's shields |
 |
| Post firing she's still their but has lost all her shielding. |
The Imperials focused on the Falcon and guessed her movement correctly. Luke however over shot the action but took time to gain a target lock on the Academy pilot. Chewbacca frantically restored a shield to the Falcon.
With no time for the weapons engineer to gain target locks the Millennium Falcon opened fire on the TIE Bomber again destoying it's secondary weapon, but it survived to add it's primary weapon fire to the rest of the Imperial onslaught.
 |
| The Falcons remaining shield flairs at it dies under the multiple hits. |
 |
| At the end of the turn everyone is still in the game. The Falcon however has a critical hit destroying the assault missile secondary weapons |
Luke finally gets in to the fight just in time to see Han and Chewie wink out in an explosion as the Falcon is battered by another all out attack. Luke's firing failed to take any TIE's out but Han finally destroyed the TIE Bomber but this didn't save the Falcon. Only the TIE Interceptor missed out in the glory overshooting the action but covering the Falcon's possible escape route.
 |
| As the light from the Falcon's explosion subsides Luke can see that she managed to take down the TIE Bomber |
Both sides engaged in fancy flying and ended up with no one in their arc's of fire.
 |
| Turn 5 |
The higher ranking Imperial officer gave poor orders to the less senior, but just as experienced counter part seeing the Academy pilot zip away from Luke. The higher ranking officer equally sent the TIE Interceptor on a goose chase while Luke zeroed in on the Obsidian pilot.
Flying straight at each other, Luke took damage but the Imperial's agility saved it from Luke's fire.
 |
| Luke and the Obsidian pilot play chicken |
The TIE Interceptor returned to combat flying in to Luke's firing arc. The TIEs executed fancy manoeuvres which the Imperials hoped would pay dividends later. This is a nice way of saying Luke didn't go where they thought he would!

Luke fired first and vapourised the the TIE Interceptor. Just 2 TIE's to go, and R2D2 restored 1 shield, but couldn't do anything about the critical hit damage to Luke's flight control making all sharp turns a red manoeuvre.
Turn 8
The Imperials out foxed Luke who ended up in the Academy pilots' firing sights but he's saved by luck causing the youthful pilot to miss.

The Imperials are learning fast and out manoeuvre Luke guessing his intentions correctly staying out of his arc while the Obsidian pilot gets a shot. Luke used the force and the dice roll the right way allowing him to evade all hits!
 |
| Blistering defence dice allows Luke to weave in and out of the laser blasts |
Everyone guesses wrong and end up away from each other!

Unable to turn tightly meant Luke couldn't get back in to the fight quick enough. The surviving Imperials use their rolls to bring their weapons to bare. The Obsidian pilot left Luke with 1 hull damage left giving the kill to the Academy pilot.
Medals all round to the Imperials!

Lessons Learnt
Don't split your forces! Focus on 1 target first.