Rey Regt - actually a heavy cavalry unit in an 1802 uniform, played as light cavalry
Turn 1
The French won the initiative and put there plan in to action to attack the flanks and hold the centre.
The large brigade sprinted off with 3 moves and made it to the ridge on the British left flank. All units in assault column with their skirmishers deployed out front. 4 battalions made it across the stream the 2/70th, 3/70th, 4/70th and the 1/2 Leger. The 1/70th were level with their sister battalions but due to the curve of the stream still on the other bank. The Corsicans supported the 1/70th. The 2/2nd Leger fell foul of the rough terrain they had to cross stopping them at the stream on the Brigades right. The supporting Dragoon brigade could only manage 2 moves and advanced to the stream ready to cross. This was a blow as it meant their horse artillery couldn't support the assault.
The 2nd Brigade advanced in line with skirmishers deployed and their guns in advance. On the right the 3rd Brigade's assault columns in mixed order advanced over the hill to the right of the summit and the Light cavalry galloped forward on to it's left.
In the shooting phase the French foot batteries in the middle opened up long range counter battery fire on the British guns opposite and caused no damage. More importantly the 1st Brigades' skirmishers fired and the first shot disordered the company of the 95th Rifles on the knoll. The second, third and fourth shots on the Portuguese Cazadores left them unscathed. The final shots were carried out by the 1/2nd Leger on the gun and it too went unscathed. The 1st Brigade were missing the Dragoons horse artillery battery. The enemy main line was left unhurt and undisrupted.
The Allies had deployed the behind the ridge leaving only skirmishers and artillery visible to the French. The British brigades deployed in line with the 1st Brigade on the British left and 2nd Brigade on the right. Behind these were the Portuguese on the right and Spanish on the left. In the middle were deployed the 2 cavalry brigades.
 |
| Allied right and centre after the French move |
The French attack was clearly being conducted on the British left and the 1st Brigade advanced to the brow of the hill to meet it with the Cazadores moving down the slopes in skirmish towards the French columns.
The French 1st Brigade was left with 3 battalions not disordered out of 7, and 2 of the disordered battalions were 1 hit away from being shaken. Jolly good shooting by the Allies.
Turn 2
This was a quick move the French 1st, 2nd and the majority of the 3rd Brigades failed to receive their commands and stayed put. The 2nd Brigades 2/4th blundered and jogged over the hill they were ordered to and stopped at the stream instead. The Dragoons charged the Royal Horse Artillery which forced it to retreat, and they retired back across the stream in the lee of the hill out of sight of the Allied guns in a display of true horsemanship. Their horse artillery moved across the stream to fire on the British dragoons. The Light cavalry's horse artillery successfully received its' order to manoeuvre and open fire on the Allied right flank, but the charge to force that flank in to square failed.
Mon dieu! The French command and control had gone to pot.
 |
| The French dragoon taking cover behind a hill having charged and forced the Royal Horse Artillery to fall back. |
The Dragoons' horse artillery did no damage to the British dragoons. 1st Brigades, firing managed to disorder the Cazadores but not much else. The 2nd Brigades artillery didn't hurt a fly and the Rey dragoon ignored the 2/4th fire with Spanish aplomb. Closing the French turn the light cavalry's horse artillery only managed 1 casualty on the Royal Welch Fusiliers at point blank range.
Phewpth!
 |
| The Cazadores are disordered |
 |
| The French 2/4th (centre left) overshoot the hill in a blunder. |
 |
| French centre |
 |
| French 3rd Brigade moving over the hilly rough ground |
 |
| The French Light Cavalry wonder why they haven't received an order to support their horse artillery (top right) |
 |
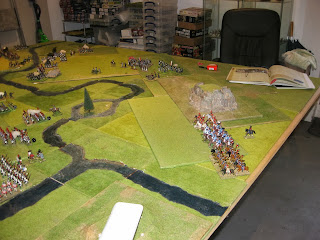
| Overview before the Allied moves and shooting |
The Allies not batting an eyelid charged the Hussars and Dragoons in the centre at the 2/4th and 1/70th forcing them to square which they succeeded in doing. The British commander then pulled the exposed cavalry back to safety including the British dragoons on his left. The British 2nd Brigade advanced on to their ridge in the middle blundering their order and were saved by the rough ground which kept them roughly in the right position. The Spanish then moved to support them on the reverse slope out of sight. The Royal Welch Fusiliers turned their line to face the right flank and the French horse artillery and the Spanish battalion supporting them moved to take their place in the line. Meanwhile the centre Portuguese pushed their artillery in front of the reforming Allied cavalry. The Royal Horse Artillery returned and unlimbered on the British 1st Brigades left flank.
The Royal Welch Fusiliers opened fire and drove the French horse artillery from the field. The newly squared French 2/4th were disordered by the Portuguese artillery fire, leaving them requiring 2 more hits to become shaken. The 1/70th too were disordered by the 95th Rifles.
 |
| French Light Cavalrys' horse artillery shot to shreds... |
 |
| ... and flees |
Turn 3
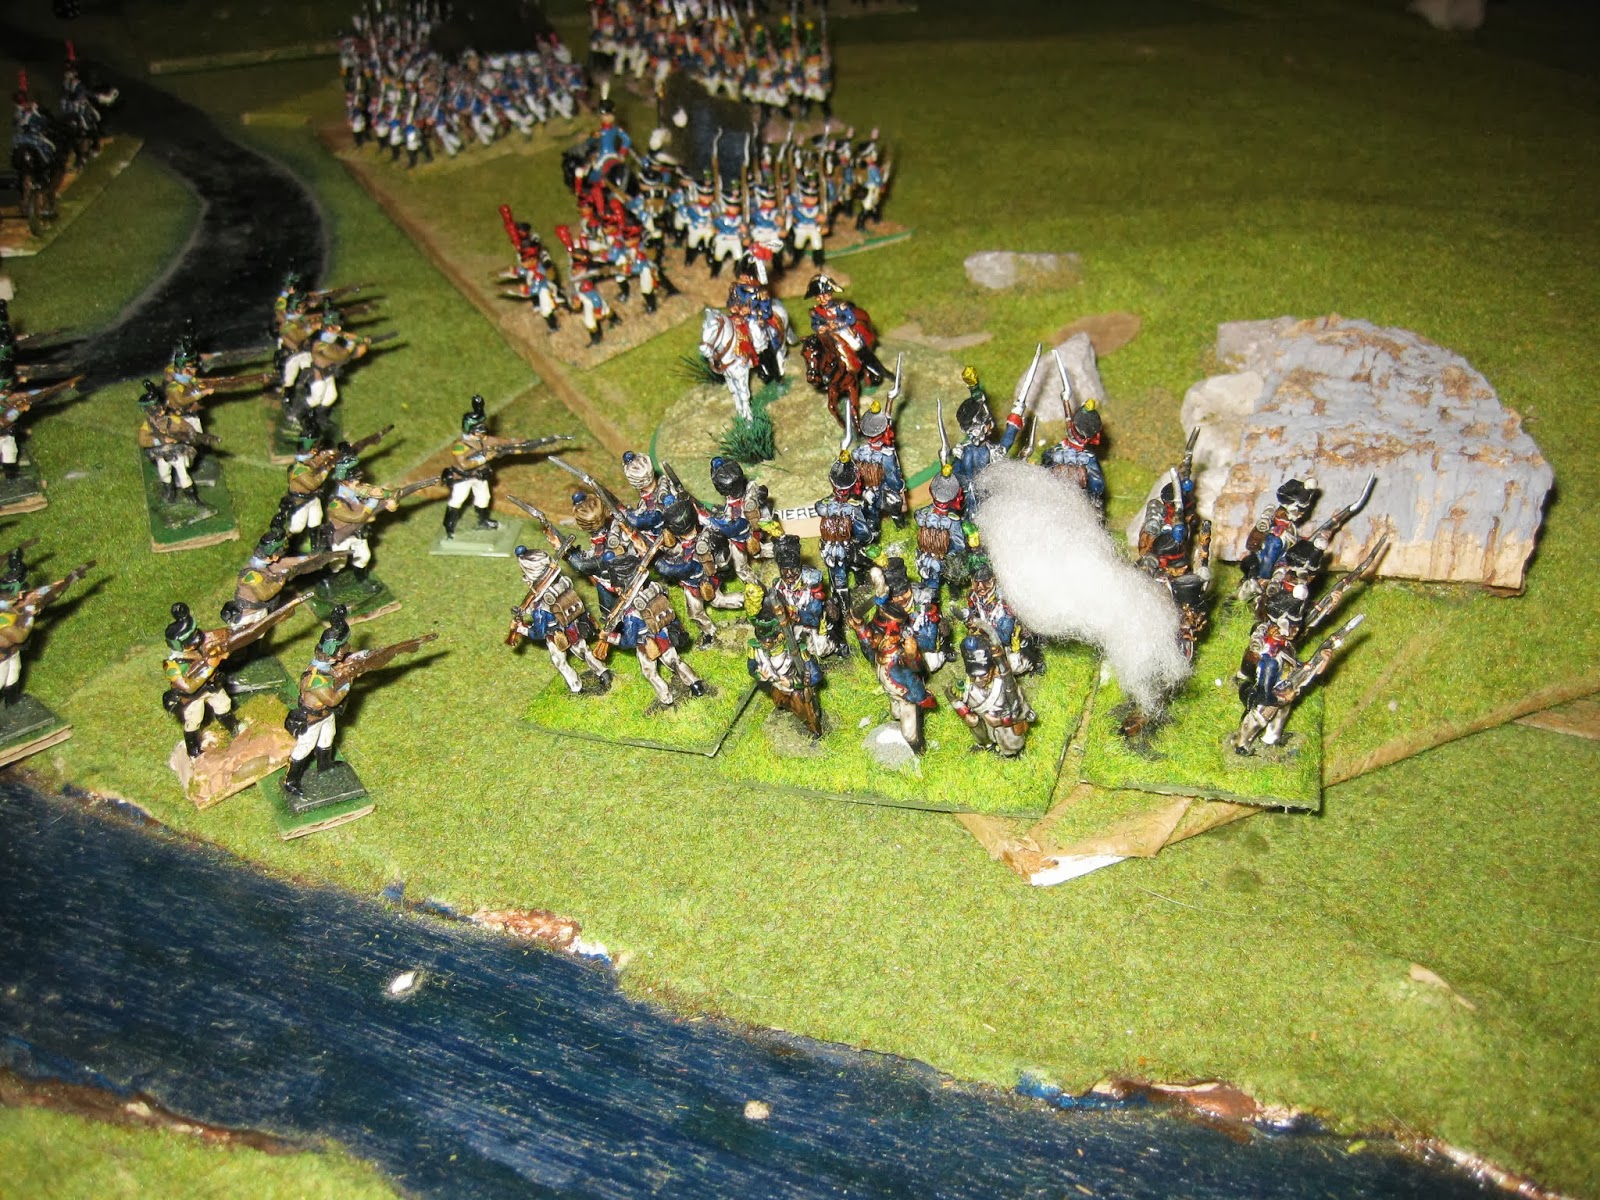
The French 1st Brigade;'s attack columns having survived 2 rounds of firing cheered and charged the ridge. The Cazadores evaded and the French charged on towards the North Gloucesters' and the West Kents'. The British chose to stand and fire getting bonuses for close range and First Fire special rule. The North Gloucester's disordered and shook the 2nd and 3rd 70th Regt battalions. The West Kent did better aided by the support of a foot artillery battery. The 4/70th were disordered and shaken and on failing their break test retreated 1 move to lick their wounds. 1 more shaken unit and the French 1st Brigade would be broken and would be forced to retreat from the field.
The 1/2nd Leger came out of square and formed line to face the 79th Highlanders supported by their sister battalion that formed line to their right.
The last 1st Brigade battalion the Corsican regiment dithered then crossed the line of march of the Dragoon's horse artillery taking their planned position where they could fire on the North Gloucester's on the ridge. The Corsicans changed formation and went in to line alongside the 1/2nd Leger.
The Dragoons horse artillery were forced by the Corsicans actions to move further the left and unlimber covering the 1/70th's square. The Dragoons themselves moved up to support the 1st Brigades newly formed line.
 |
| The Leger in line, and the shaken columns in the centre |
The 2nd Brigade once again failed to receive orders staying put in the middle denying their guns to be brought closer to fire on the visible British 2nd Brigade.
Despite the set back of 2nd Brigade, 3rd Brigade decided not to hang around and try and relieve pressure on the 1st Brigade by assaulting the British 2nd Brigade. They advanced smartly clearing the hilly rough ground and the meandering stream which staggered their brigade formation and depending on your point of view left them too short to charge or too far advanced to deploy tidily. Either way they were now exposed to close and medium range fire. The French general's impatience with his Brigades failures to receive orders had now undone him by giving a hasty order.
The Light Cavalry had lost their horse artillery with which to punish any unit they forced in to square dressed their squadrons to form a line facing the Allied flank ready to exploit any opportunities the 3rd Brigade created.
The French commenced firing knowing it was crucial to disorder the British to ensure their assaults would be a success.
The Leger battalions started first causing a casualty on the Royal Horse artillery, which was poor out of 6 dice plus 2 re-rolls for misses. The shaken 2nd and 3rd battalions of the 70th Regiment had more luck causing 1 casualty on the West Kents' and disordering them.
 |
| Royal Horse Artillery bottom left with it's casualty and the disordered West Kent's centre |
The 1/70th and 2/4th still in square failed to hurt anyone.
The only success for the artillery came from the foot battery in the 2nd Brigade managing to disorder the British Hussars in the centre.
The final brigade to shoot was the 3rd, who crucially needed to disorder the British line to lessen the fire they were about to receive and give them a chance to charge home next turn. Phewpth! We will not speak about their lack of success.
 |
| The centre and 3rd Brigades attack. Note lack of disorder smoke on the British line. |
 |
| The Allied right flank and the French 3rd Brigades' attack |
 |
| Overview from the Allied right |
 |
| A view of both French brigade attacks |
The Allies tidied their ranks and launched their cavalry. The Rey regiment charged from the centre at the French 3rd Brigade forcing the 1/76th in to square. Their job done the Rey fell back to their start point. Then the British Hussars and Dragoons on the British left charged the Leger battalions forcing both to square successfully. Like the Rey regiment they both fell back to their start points. This was beautiful use of cavalry.
Shooting!
The 1/76th now is square was blasted with canister and close range fire from the Royal Artillery and Connaught Rangers. Shaken and disordered they fled the field taking their Eagle with them. The next closest columns of the 76th Regiment were disordered and took casualties, with 1 close to being shaken. Disaster for the French. To the mathematically minded not a surprise. Being disordered close to the Allied line meant they couldn't charge or retreat but would need to sit and take further punishment till they could reorganise at the end of the next French turn. If they could not survive that long the brigade would be broken.
 |
| 1/76th |
 |
| The French main attack in trouble. 2/24th in square on the left haven't been shot at yet. |
The Allied firing moved down the line and the Portuguese artillery shook and disordered the 2/4th of 2nd Brigade. The rest of the brigade was out of harms way but as it was the smallest French brigade with 3 large battalions, if 1 more battalion could be shaken the brigade would break. That earlier blunder was proving costly. Another take would be that the previous failed command rolls now ensured that the brigade was safe, however if I'd been successful I'd have used them to soften up 3rd Brigades assault.
At this point we move on to the firing on the troubled French 1st Brigade. The disordered Cazadores opened fire on the 1/70ths square and disordered and shook it thus breaking the largest and therefore key offensive brigade of the French. The 3/70th couldn't withstand the British fire and fled. The 2/70th held on still shaken and the Leger squares escape relatively unscathed.
Running out of targets the artillery moved to the 1st Brigades supports disordering and shaking a French dragoon regiment. This French brigade was the smallest in unit size and unit numbers and had been uncovered by the Leger going in to square. A 2nd dragoon regiment then received additional artillery fire leaving it 1 hit off being shaken which would break the brigade.
 |
| The broken French 1st Brigade before their retreat and the supporting Dragoons close to breaking too |
Wow, poor French decisions and great combined arms by the Allies. Wellington would be proud. The French now had 1 brigade broken and 3 in danger out of a total 6. The French army break point was 3 brigades. Turn 4 would be the decider.
 |
| Overview |
 |
| The broken French 1st Brigade and the hurt supporting Dragoons |
 |
| At this point the British commander observed that none of his units had taken more than 1 hit compared to damage dished out to the French. Here's the casualty on the British Horse Artillery facing the French 1st Brigade. They needed 1 more to be shaken. |
 |
| The 1 casualty on the West Kent's facing the French 1st Brigade. They needed 3 more to be shaken as they are a large unit. |
 |
| The Connaught Rangers centre and Royal Welch Fusilers far right both with 1 hit and would need 2 each extra to become shaken. Overall the Allies had 4 casualties to France's broken 8 battalions and 2 units close to breaking, which due to the brigade morale rules put a total of 7 battalions at risk. Ouch. |
Turn 4
The French 1st Brigade began it's retreat. The Dragoons now had no one to support and were exposed to the full force of the Allied artillery. Those that were able were ordered to retire towards the centre but the staff officer failed to get through and they fatefully stayed put supporting their shaken and disordered colleagues.
True to form the staff officer calling for the 2nd Brigade to move up the centre and cover the retreat of 1st Brigade and use it's artillery to support 3rd Brigade got lost. The amount of lost staff officers worried the French commander. The rules don't put a number on the staff available but I must have been getting close to sending valets and grooms!
The 3rd Brigade had nothing for it but to charge. The fit units could have pulled back but their disordered comrades were stuck and if they broke they'd all have to retreat. The Provisional Croatian battalion and the 3/76th chose glory and charged. The Albion Triumphant rule regarding French columns meant if they survived closing fire only 1 battalion would charge home to simulate the difficulty of less trained troops co-ordinating their attacks. Miraculously both battalions made it, although the 3/76th was disordered from the Connaught Ranger and Royal Artillery shooting. The Croatians became the first French to get to grips with the British and showed their mettle by shaking the Rangers who fell back. The Croatians formed line ready to continue the advance next turn.
 |
| Glory! The Croatians take the ridge pushing the Rangers back and form line |
 |
| In the the distant right the French 1st Brigade retreats |
The French Light cavalry still had nothing to add so kept their station. The final act was for the commander in chief himself to gallop forward and attempt to rally the 2/4th's square of 2nd Brigade in the centre which he successfully did.
 |
| The Allied right with the French Light Cavalry observing |
 |
| Overview |
 |
| French Light Cavalry |
 |
| Centre left the French CinC rallies the 2/4th's square |
 |
| View of from the French 2nd Brigade of the 3rd Brigades attack |
The Allied focus was naturally on breaking 2 more brigades and victory.
Firstly they charged the shaken and disordered French Dragoons with their British counter parts. The French were unable to evade or counter charge so had to take the charge at a standstill. The British Hussars with them charged the Dragoons' horse artillery in the rear.
Next the British Hussars in the centre charged the Croatians and made them form square which they did but became disordered. The Royal Artillery batteries on the ridge them turned to face the new square. The tension was mounting. The Spanish Rey regiment who had been next to them followed the British Hussars charging the 3/76th forcing them in to square as well.
 |
| The Croatians. Interestingly if the Allies hadn't forced them in to square both Royal Artillery batteries could have manoeuvred and claimed enfilading fire from both sides firing down the line. That would have been very bloody. |
Not surprisingly the Croatians were blown from the field. Surviving 2 lots of canister then the inexpert fire from the Spanish Militia put them over the edge to fail their break test. 1 more battalion from the Brigade was now need to be shaken. The coup de grace was delivered by the 87th Prince of Wales Own Irish upon the French 50th Regiment, the battalion who ironically had been guarding the baggage for the previous 2 games.
The French had now lost 2 brigades and 1 to go for a Allied victory.
Continuing the Allied firing the Portuguese artillery and the Cazadores concentrated on the newly rallied 2/4th square. This combination of fire broke them and they fled the field taking the French commander with them.
 |
| The 2/4th about to flee with the CinC either dead or carried off in the panic. An ignominious end to French battle. |
 |
| Victorious British cavalry |
Temporarily without a commander in chief the French dragoons faced the British Hussars who scattered the disordered dragoon regiment and continued their charge into the next dragoon regiment who did not have time to counter charge shaking it and thus breaking the French heavy cavalry brigade. The final act the British Hussars rode down the horse artillery.
 |
| The end of the French Dragoon brigade middle top and the end of the French fight |
 |
| The broken French 3rd Brigade |
 |
| The rocks clearly visible now the French square had run off with their CinC |
 |
| The retreating French left flank - 1st Brigade and Dragoons |
 |
| View from the Allied left down the line |
 |
| The victorious Allied line |

 |
| Another view of the death of the French Dragoon brigade. The gun was destroyed but I haven't taken it off the board |
 |
| View from the Allied left with the retreating French 1st Brigade and Dragoons in the distance |
 |
| End positions of the victorious Spanish and British cavalry |
 |
| The Allied right flank at the end |
 |
| Clear gap left from the destruction of the Croatians |
 |
| The Allied right still being observed by the French Light Cavalry now readying themselves to be the rearguard in the French retreat. |
The French with 50% of their army broken and in retreat had no choice but to quit the field. The 3rd battle of El Valle was a resounding Allied victory over turning the 2 previous defeats in style. Of course for me I'd now lost 3 games.
Review
Great game. The Allies did everything I wanted them to do when I dreamt up the scenario. The only issue was I wasn't in command. The French were bedevilled with bad command dice then completely shot in the foot by a bad order charging the 3rd Brigade towards the ridge before they were positioned correctly and the 2nd Brigade artillery had time to soften the enemy up. I was too impatient or as my kind opponent said too aggressive. I do like a good headlong charge!
The Albion Triumphant rule additions worked nicely and gave the game a Peninsular feel. The French ruling for columns charging home in a stagger is harsh, especially if the Allies are getting their all arms combination right. I think the French do need to 'prepare' the enemy line with skirmisher and artillery fire before launching an attack. You definitely do not get the sense of unstoppable columns.
This ends the fighting in El Valle and the war will move on next game.